
Lead Layout Solution Explained with Use Cases
Pankaj Kumar
What is the Lead Layout feature?
The Lead Layout feature in Corefactors allows you to create custom lead forms for different sales teams or processes. Each layout can have its own fields, sections, and lead stages - so every team sees only the information they need.
Why is the Lead Layout Feature important?
In real-world sales processes, not all teams work the same way or need the same data. Keeping this in mind, this feature can help organizations streamline their complex sales process.
Consider these two scenarios:
- Complex Sales Cycles (Example: Software or B2B companies)
One lead passes through multiple teams (Pre-sales → Sales → Post-sales). Each team needs a different view of the lead and has different pipeline stages. - Multi-product/services Sales (Example: Fintech or Insurance companies)
Different teams sell different products (e.g., Housing Loans vs. Car Loans), so each team needs a different lead form to work on only the data relevant to their product sales.
Before we start – It is recommended to keep these things handy
To configure lead layouts effectively, you need:
- A clear idea of your sales team structure (Pre-sales, Sales, Post-sales, etc.)
- Details of your sales process – what lead fields are needed, what stages the leads go through, etc.
- Knowledge of which teams need which fields (to avoid clutter and confusion).
How the Lead Layout Feature Works: A Quick Overview
- You create Layouts under Lead Layout Configuration.
- Each layout contains:
- Sections – the logical grouping of fields (e.g., “Address Info” or “Loan Details”)
- Fields – pulled from a central Master Field List
- Lead Stages – pulled from a Master Stage List
- Field Mapping – to set dependent field behavior (optional advanced setup)
- Once the layout is created, you assign layouts to teams, so that each team works with the right lead form as per their sales process.
Step-by-Step Setup
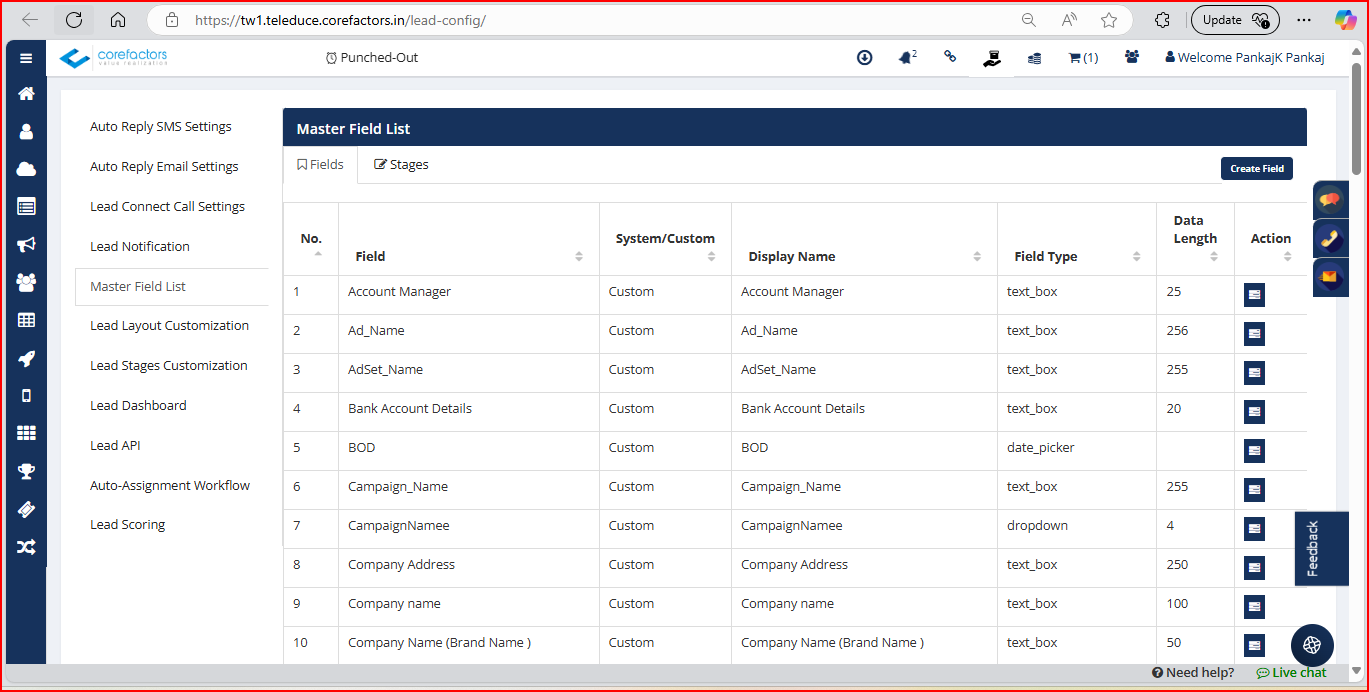
Step 1: Define Master Fields and Stages
Go to: Lead Box > Layout Configuration > Master Field List
This is where you define/create all possible lead fields and stages your business needs. Think of it as your global field library.
- Examples:
- Text Field: “Customer Name”
- Dropdown: “Lead Source” with values like “Facebook”, “Website”, “Referral”
- Date Picker: “Follow-up Date”
Once a field is created in the Master List, it can be reused across any number of layouts.
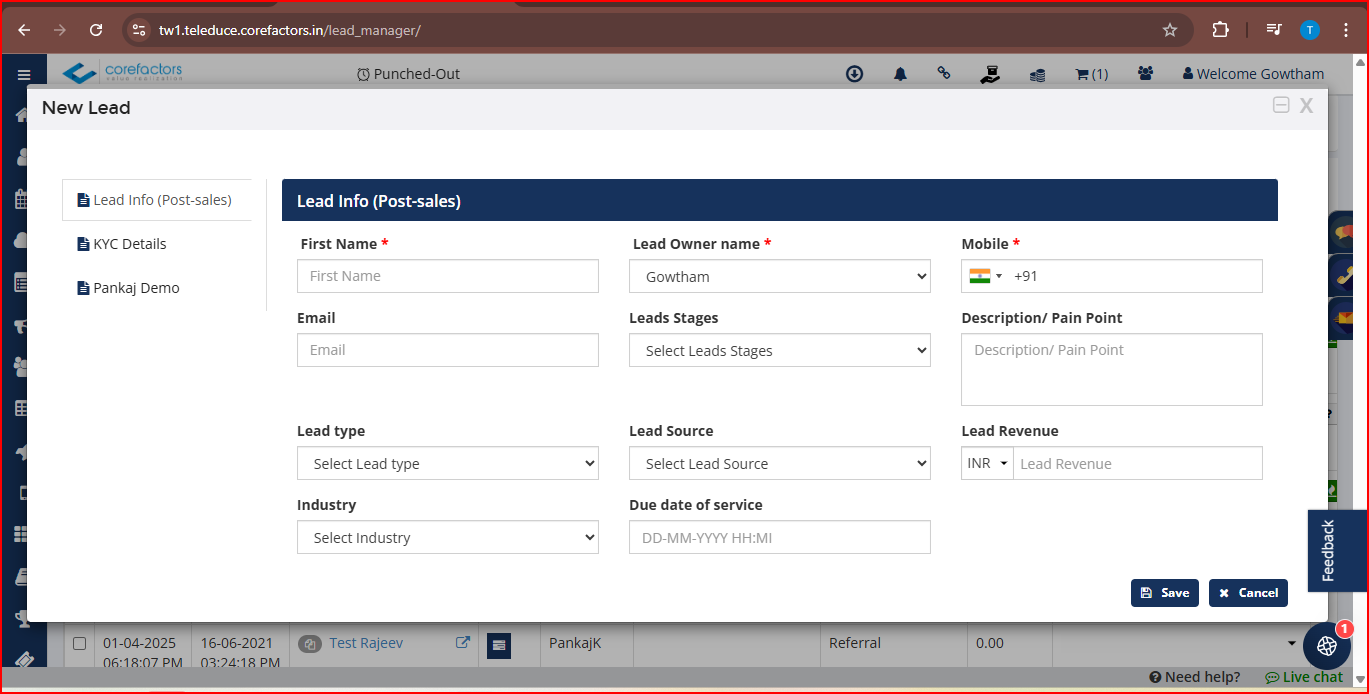
Step 2: Create a New Layout
Go to: Lead Box > Layout Configuration > Lead Layout Customization
- Click on Create New Layout
- Give your layout a name (e.g., “Pre-Sales Layout”, “Car Loan Layout”)
Note: To ensure the application functions correctly, the system automatically adds 9 fields to the first section by default. However, you can rearrange them in the layout section per your preference once the layout is created.
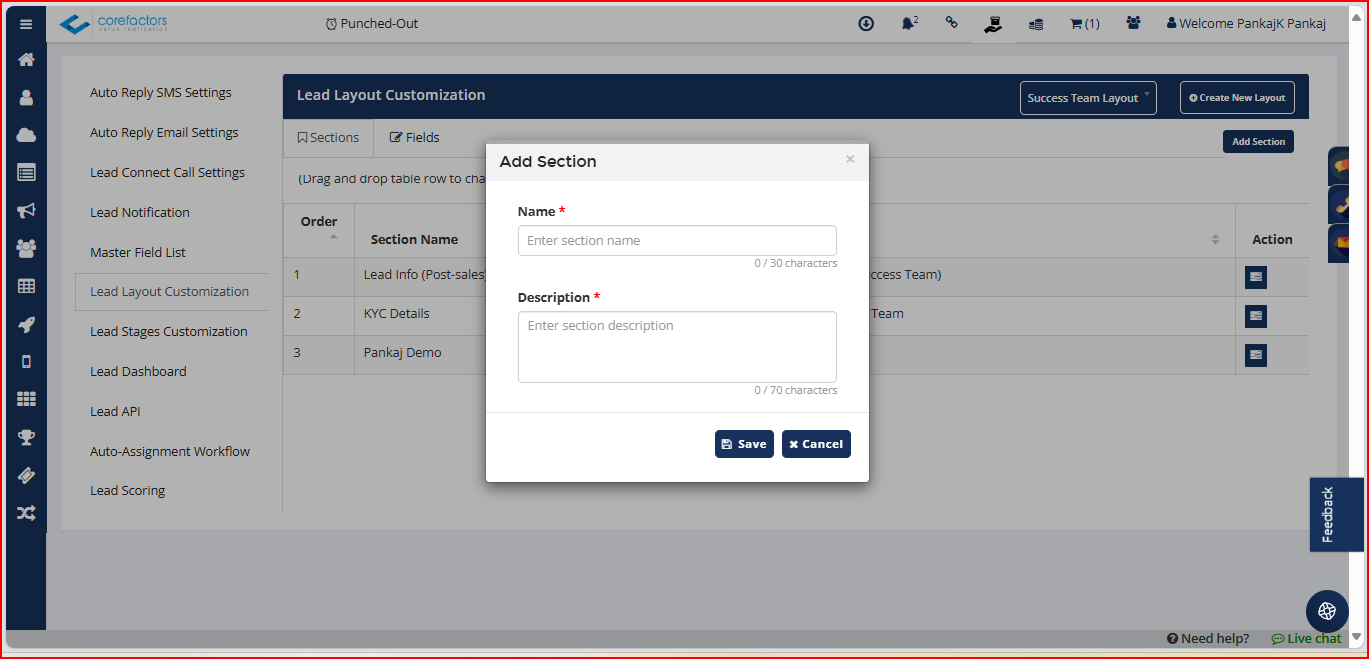
Step 3: Add Sections to Organize Your Layout Form
A section groups related fields together, making forms easy to navigate.
- Example Sections:
- “Basic Info”
- “Customer Address”
- “Loan Details”
- “KYC Details”
Click Add Section, give it a name, and you're ready to add fields inside it.
Step 4: Add Fields to the Layout
You can add fields in two ways:
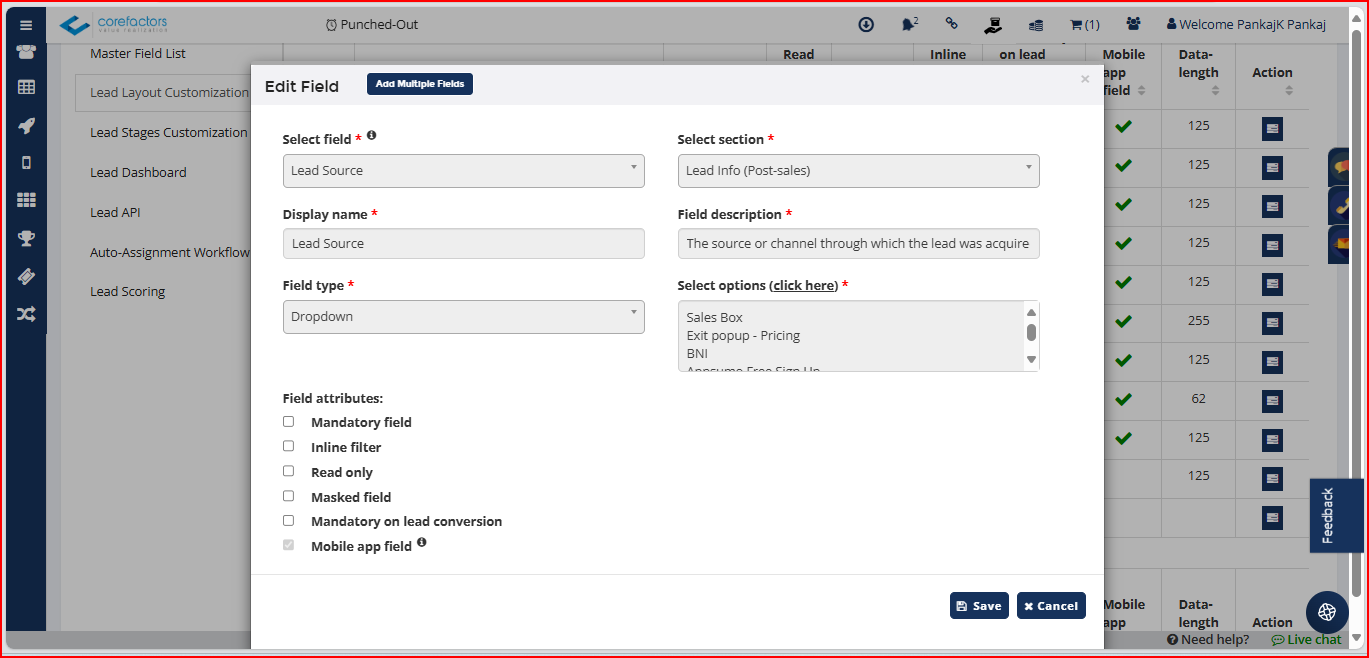
A. Add Single Field
- Click Add Field
- Select a field from the Master List in the “Select Field” dropdown (only fields not already added will appear here for your convenience)
- Choose the section where it should appear
- Set field properties (e.g., Mandatory, Masked, Read-only)
- Click Save
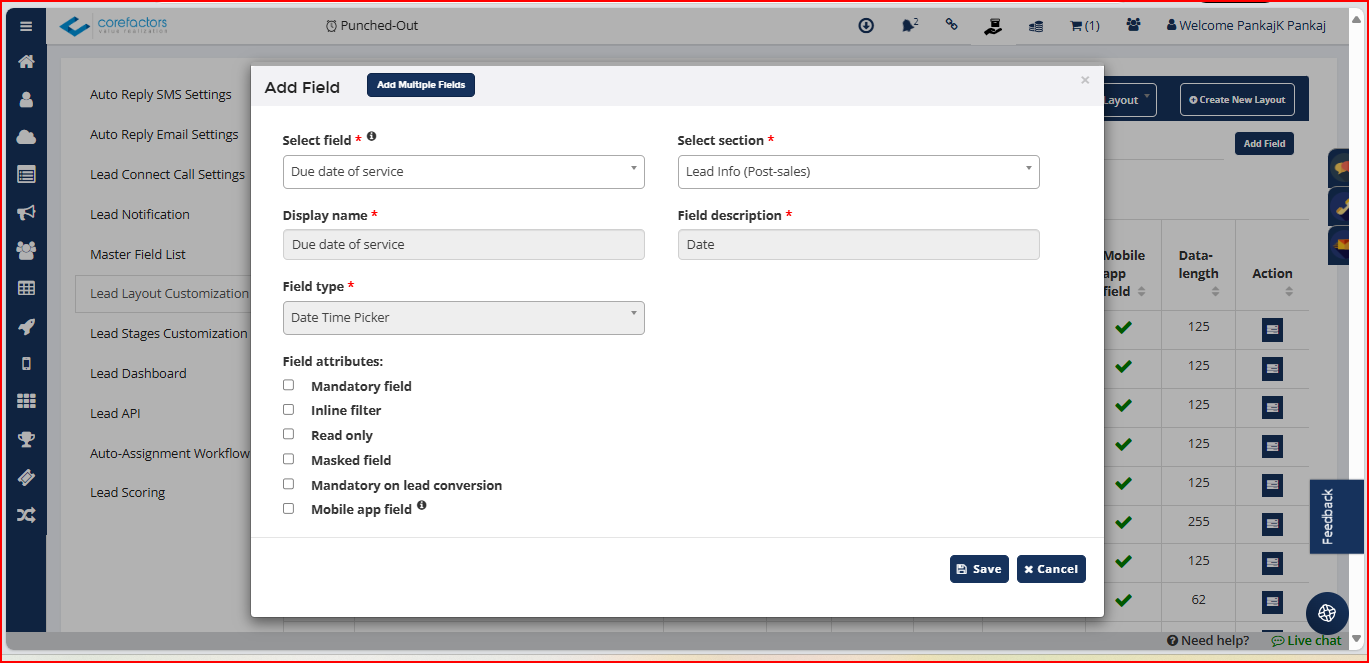
The newly added field in the Layout will appear to the users/teams assigned to that layout.
B. Add Multiple Fields at Once
- Click Add Multiple Fields
- Choose a section
- Select multiple fields using checkboxes
- Set their properties in one go
- Click Save
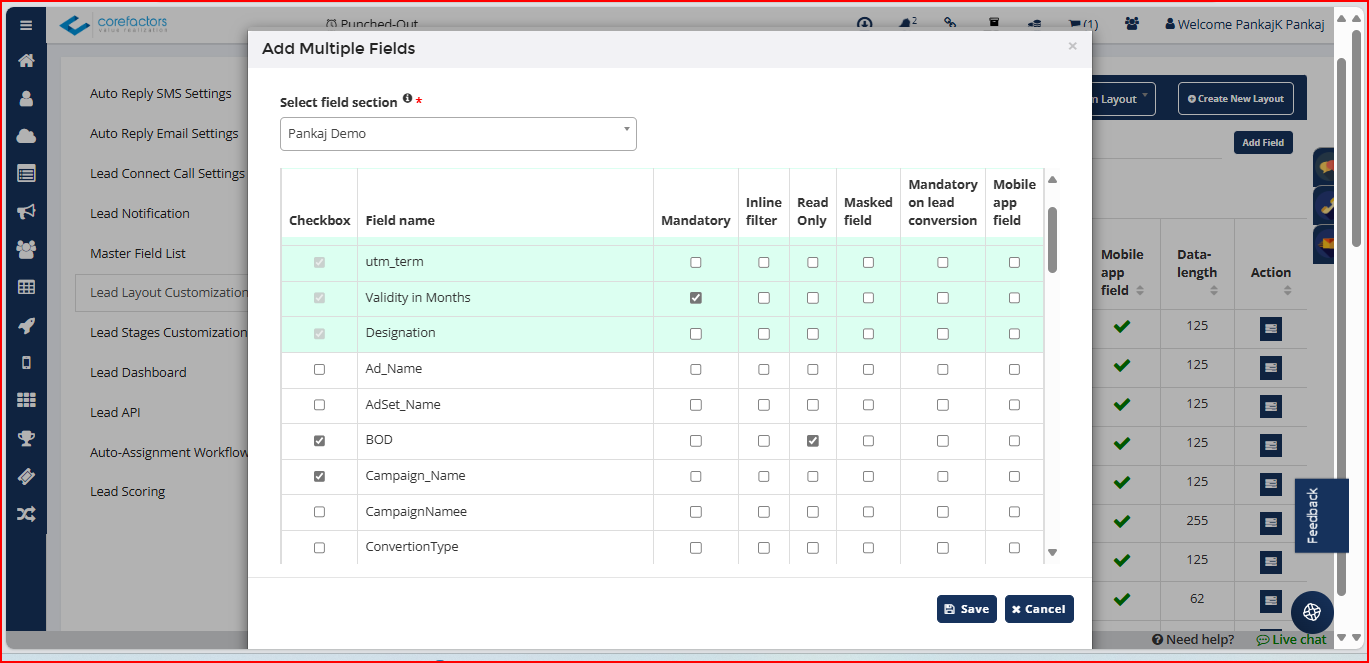
Note: Green-highlighted fields are already in the layout and highlighted here for your convenience
Step 5: Customize Dropdown Options (Optional)
For dropdown-type fields (e.g., “Lead Source” or “Product Type”), you can customize which options should appear in each layout.
- Click “Select Options (click here)” next to the field
- Choose only the values relevant to this layout

Example: Lead Source in your master list may have 50 lead sources as dropdown options, but your “Car Loan Layout” should show only 5.
Step 6: Add Lead Stages to the Layout
Go to: Layout Stage Customization
- Select the layout
- Click Add Lead Stage
- Choose from the Master Stage List

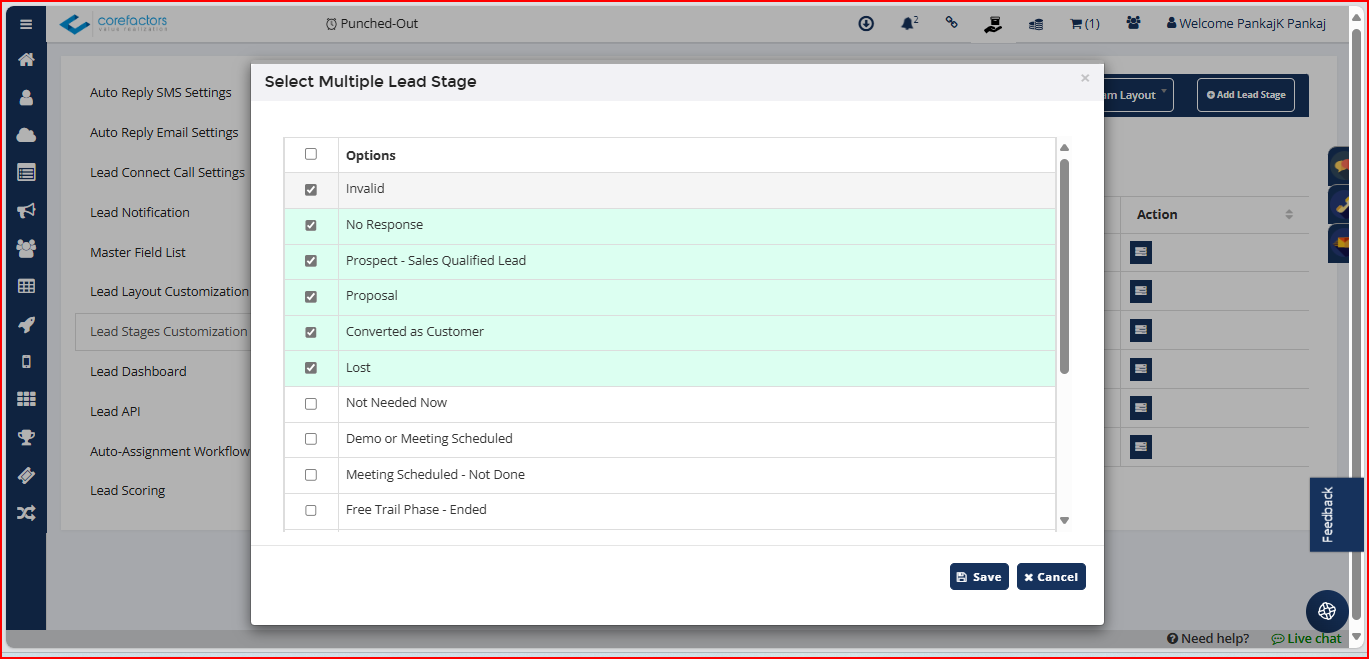
This ensures that each team sees only the stages relevant to them, keeping the workflow clean.
Step 7: Assign Layout to Teams
Go to: Admin > Hierarchy Management
You can assign a layout to a team in two ways:
- New Team – Use Add Team and assign layout during the creation.
- Existing Team – Click Edit Team and choose a new layout.
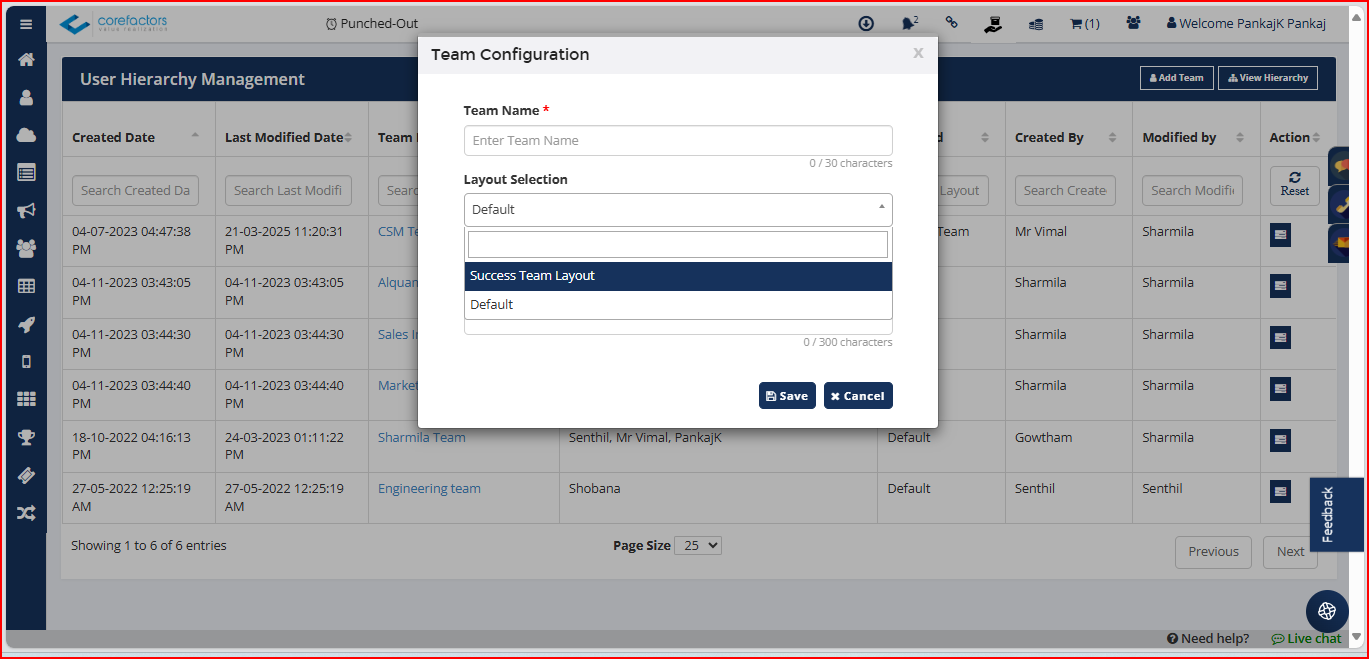
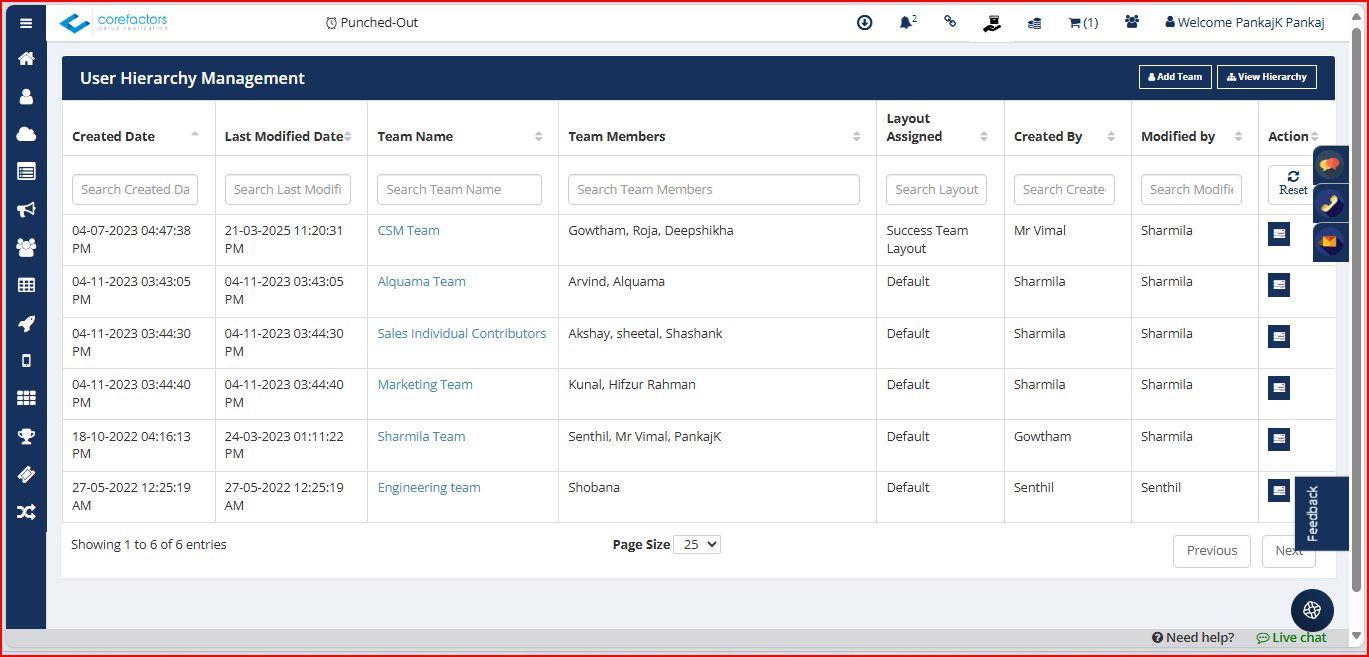
Please note: Each team can access only one layout at a time, but a single layout can be shared across multiple teams.
Once assigned, the team will automatically see the customized lead form per their layout.
Important Notes
- System fields (9 in total) are added by default to every layout. You can rearrange but not remove them.
- Fields and stages must always be created in the Master List before they can be added to a layout.
- Custom dropdowns allow you to simplify what users see.
- Assigning layouts properly ensures users don’t get overwhelmed with irrelevant fields.
You're Done Customizing Lead Layouts!
Once your layouts are set up and assigned, each team will see a customized, clutter-free lead form designed just for them.
This makes lead handling faster, cleaner, and more efficient.


.png)