
How to Customize the Lead Fields?
Navigate -> Lead Box -> Last Icon -> Lead Box Configuration

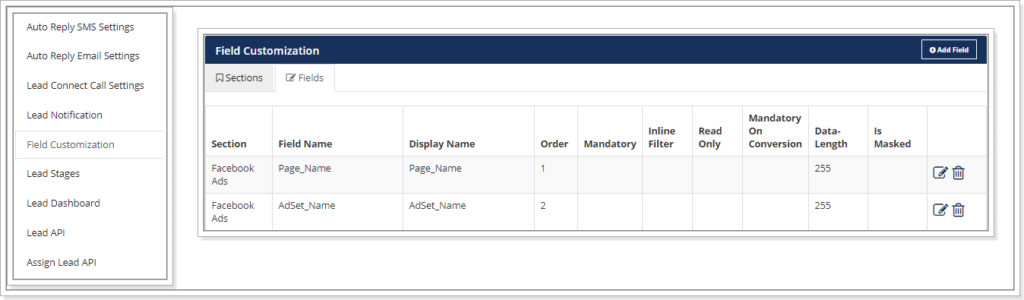
Click on Field Customization as shown in the below image
Click on Add field – To create a new field of your choice
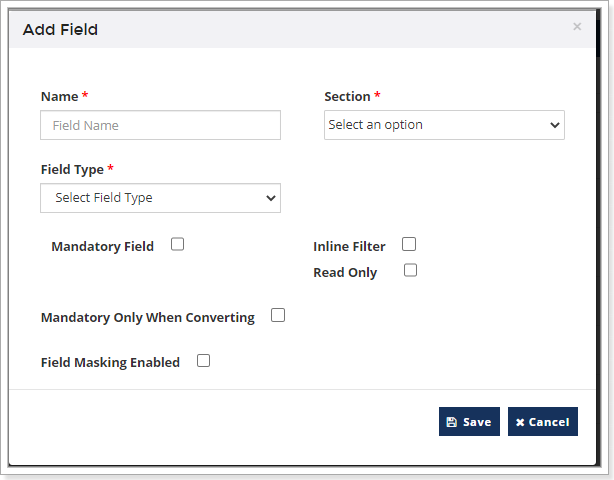
- Name – Define the Field Name.
- Section – Select the section the field belongs to.
- Field Type – Based on the requirement you have, you can define what kind of a field you want to create. Below are the options you can check out –
- Text Box – You can allow Alpha Numeric text options or you can allow only Numeric with the data length.
- Drop down – Where you can define your lists for the agents to select one option.
- Multi Option drop down – You can add your dropdown lists, the agents are allowed to select more than one option.
- Text Area – The agents are allowed to type the details as much as they need. Here there is no data length defined.
- Date Picker – If you want a field to have a calendar drop for saving the DOB or any important dates of your leads you can choose the option.
- Date and Time Picker – You can create a field which allows you to define the date and time as well.

- Mandatory Field – You can make the field Mandatory for the agents to fill it.
- Mandatory Only When Converting – Helps the agents to fill in the information while the lead is converted.
- Read Only – The field here is not editable, once the information is filled buy the agent.
- Inline Filter – The option helps you to have a quick filter for the dropdowns.
- Field Masking – you can mask the fields which has the sensitive information of the leads


.png)


.png)